Before I start describing this trip, I have to give so much credit to the incredible blog that I used to plan this epic road trip. If you’re planning on a trip to NZ and want advice about anything, especially itineraries for north and/or south island in one week, ten days, two weeks, one month, etc., this website is probably the best advice I will offer in this entire post: www.inafarawayland.com. I followed his 10-day itinerary, which you can find here: www.inafarawayland.com/10-day-itinerary-south-island-new-zealand/ (though my trip was actually 12 days total- I spent an extra day in Christchurch on both ends).
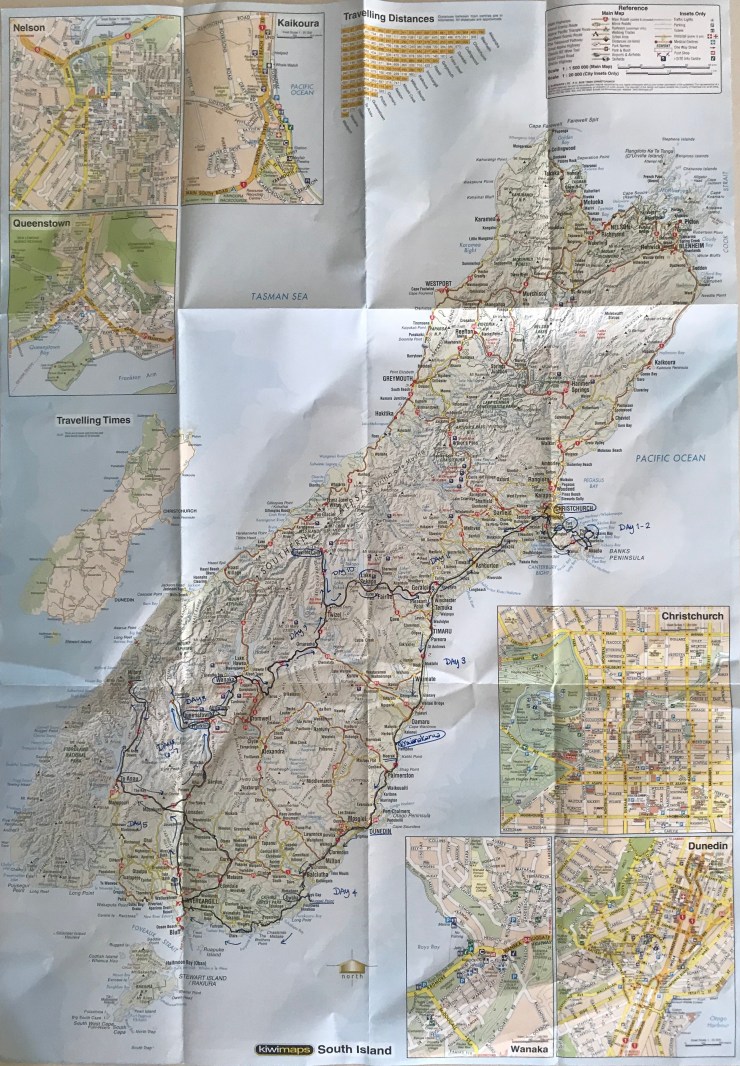
Now getting to my trip. I’m handling my posts about NZ different than any other country I’ve visited so far. There’s just no way to squeeze in all the details and photos in a single blog post. So, below I’m giving an overview of my road trip below, in case anyone is interested in planning a similar trip and curious about my thoughts after following the itinerary above (as well as learning about how I modified, where I might spend more or less time, etc.), but click on the following links for separate posts about Epic South Island Day Hikes, Fiordland National Park & Milford Sound, and the Southern Scenic Coastal Drive. Below is a map of the South Island, showing the routes I took, with cities I stayed in overnight circled.

Let me start with the second most important piece of info in this post: if you want to see NZ properly, there is no substitute for renting a car and driving yourself. I probably spent about as much money as if I had taken one of the cheaper tours, but I saw so much more than I would have seen on the tour and I had the flexibility to do whatever I wanted every day- including, often, pulling the car over on the side of the road to photograph stunning scenery and squeeze in a hike. There is just so much to do and the tours put together by big companies skip most of the best parts. In summary, if you want to go to NZ, 100% you should rent a car! (I’m from the US and had no trouble at all adjusting to driving on the left side of the road.)
Other Travel Tips to kick off this post: (1) if you travel during the peak summer season, book accommodations (including campsites) well in advance. Almost every hotel, motel, hostel, and campsite that I drove past during my road trip had “No Vacancy” signs up, and you can’t free camp (park your car anywhere and sleep in it) in NZ. (2) If setting off for a day hike, always have sunscreen, bug spray (sand flies, which bite, are super thick in some areas and really annoying!), and adequate water with you. (3) Know where it’s smart to save money. I had awesome experiences with my two couchsurfing stays, and was super impressed with hostels across NZ- except in Queenstown. If you’re a guy, you can probably get away with hitchhiking, but if you are female, don’t. While there are few incidents, and the south island has a reputation of generally being safer than the north island, locals here all cautioned against this if you are a solo female traveler. (4) NZ is an expensive country to travel around. You don’t have to do grocery store runs or cook for yourself, but if you opt to eat out for each meal, be prepared to spend, on average, 15-25NZD for breakfast and lunch, and 20-50NZD for dinner (those are not at fancy places either, though my dinner cost does factor in having a drink or two). As you can see, cooking 1-2 meals/day yourself will save you a lot of money over a 10-day road trip. (5) Unless you’re a big group/family, rent the smallest possible car you can, because gas is expensive! Around most of the south island, gas runs about 2.01NZD/litre (= approx. $5.60/gallon). However, know that “compact” rental cars in NZ are teeny tiny two-seater smart cars (with no trunk); I rented a Corolla, which often qualifies as a compact car in the US but is “intermediate” rental class in NZ.
Day 1: Christchurch, Canterbury.
Transit: Flight from Wellington to Christchurch (1 hour); rental car.
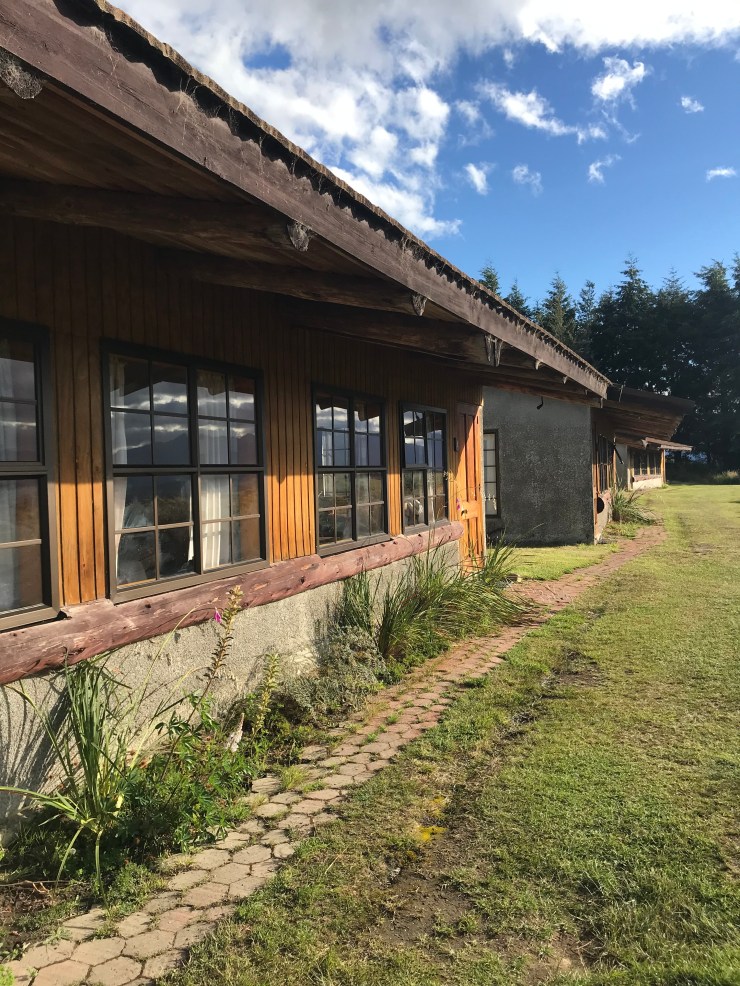
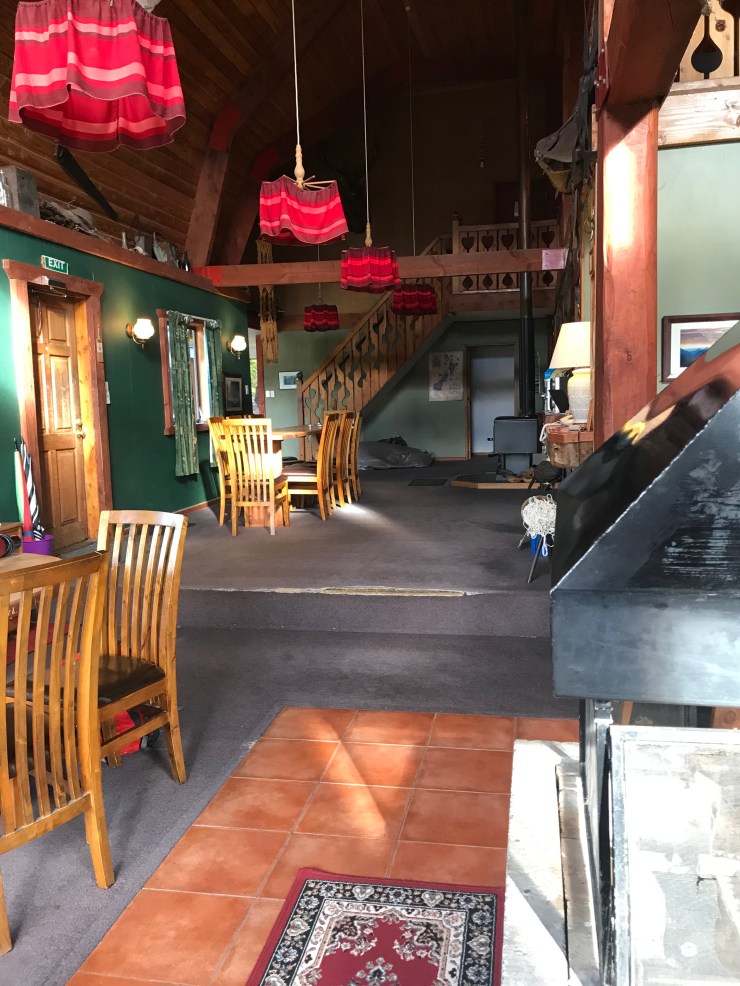
Accommodation: Jailhouse Accommodation (https://www.jail.co.nz/), 36-40NZD/night for bed in 2-bed dorm room. Highly recommend! It is literally a former prison, which has been converted into a hostel. They have preserved a few cells and included loads of historical information and artifacts; there is some amazing prison graffiti in one cell. You can also peek into the cell that was used for solitary confinement, and even sadder, “the hole” where people were sent for three days at a time and given only food and water. They even have a café (with all the espresso-based drinks you’d get at a coffee bar anywhere!), which I’ve never seen in a hostel, not to mention all the functional things you want in a hostel: clean; huge kitchen; quiet hours that begin at 9pm (and people actually respect them!). Such an incredible value, and because of how cool the building and history is, even if you’re not on a budget I think anyone would enjoy a stay here!


Activities/All About: The itinerary above suggested picking up a rental car and setting out immediately, but I am so glad I decided to give myself one day and one night in the city. Christchurch was devastated by an earthquake in 2011, and lots of the historic buildings in this city remain in various states of disrepair. But the rest of the city is thriving and there are loads of well-reviewed restaurants, cafes, and bars. However, apart from spending some time strolling around the city (unlike Auckland and Wellington, Christchurch is relatively flat so is a great city for a really leisurely walk) and enjoying the parks and green spaces (there are so many and they are amazing!!), I only visited one spot: C1-Espresso. (But see Day 12 for another food recommendation.) This place is massively popular, for a good reason. Great hours (no midday close after lunch or before dinner, which is quite common here), free wifi, coffee bar, food, and alcohol, plus awesome ambiance. What more could you want in a café? How about having your food delivered via canisters that shoot through an intricate series of piping along the ceiling? Seriously.


Christchurch is a charming city, but quite sleepy compared to Auckland and Wellington; perhaps I was just out too early in the evening. One thing this city does really well is signage; there are massive street signs and maps everywhere, making it very easy to navigate!


After spending a bit of time exploring the city, I focused on my priority: getting ready for my road trip! That meant a trip to the grocery store. I was even able to pick up one of those handy lined, cooler bags for less than 3NZD! Though there were plenty of cafes and restaurants to eat at throughout the South Island, I wanted to eat more healthy, which is much easier when not eating out all the time.
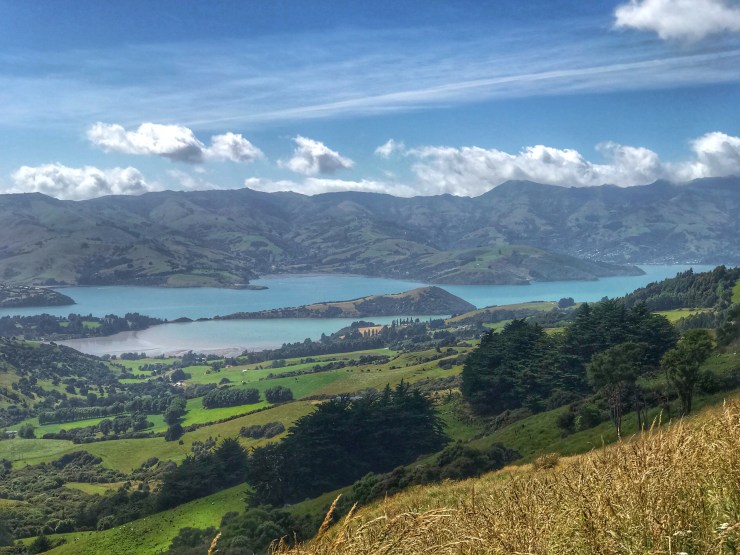
Day 2: Banks Peninsula; Overnight in Port Levy.
Transit: For my second night in the south island, I had a reservation at a local’s home in Port Levy, which is only 30 minutes south of Christchurch. While this made no sense (see below), the short drive to my accommodation gave me an entire free day to drive and explore Banks Peninsula, which is full of beautiful coastline and hikes! I drove to Okains Bay and Little Akaloa, before making my way to Akaroa for lunch. The road from Akaroa to Port Levy is horrible. It is by far the worst road I drove on in the south island. (The road is in such poor condition and so windy and narrow that campervans are specifically prohibited.) Unless you have a car with four-wheel drive, do not attempt this drive under anything other than very good weather conditions, and if possible, avoid entirely.
Accommodation: Couchsurfing! This is like Airbnb, except people don’t charge you anything to stay in their home. My first experience and it was wonderful. My host, David, not only let me stay in his house for free, he provided a towel, fixed dinner, and bought me wine (when he learned I don’t drink beer). And he has a super sweet dog, Holden, who loved to cuddle up with me. It made for a wonderful stay.


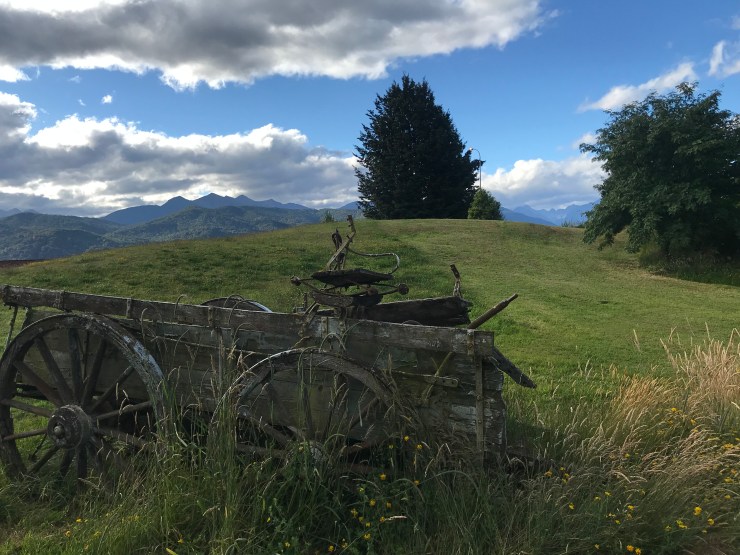
Activities/All About: I departed from the advice in the itinerary somewhat, as I spent most of my day driving around Banks Peninsula and not in Akaroa, which is cute, but so overloaded with tourists I had little interest in spending too much time there. But I certainly took in some spectacular views while driving around the Peninsula!


If you find yourself driving along the dangerous road to Port Levy, about halfway into the drive, you’ll find a trailhead for the hike to Mount Herbert. This turned out to be a fantastic hike! More on this in the post on Epic South Island Day Hikes.

Day 3: Moeraki; Overnight in Waianakarua.
Transit: Today was lackluster compared to yesterday. The first bit of the drive, along the windy, scary, and beautiful roads leaving Port Levy, offered some gorgeous views when passing by Diamond Bay.

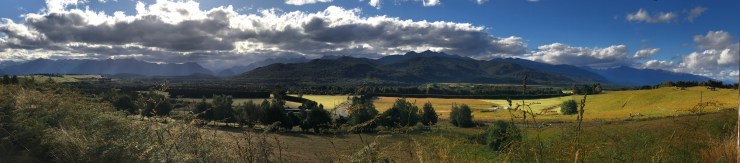
But most of the four-plus hour drive was on divided, two lane highways, through very rural, agricultural areas. There were plenty of villages along the way, and I recommend making a stop in Ashburton, which is full of charming cafes (many of which are attached to gardens). I grabbed a coffee at Nosh, which would have also been a great lunch stop!
Accommodation: I arrived to my Airbnb, which is just north of Moeraki, mid-afternoon. My Airbnb is a working farm, and pulling into the driveway I noticed an adorable group of calves hanging out; I was also greeted by the family’s two dogs and, once inside, cat. They also have a pig, sheep, and bunch of chickens. Loving the farm stays!


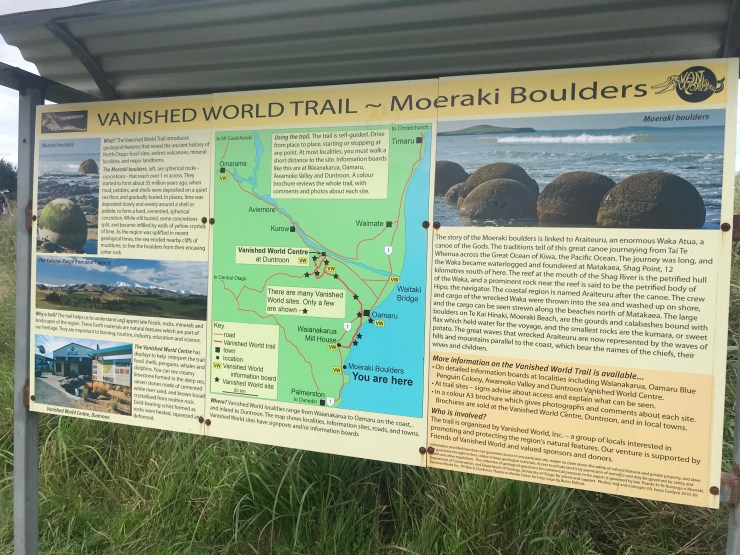
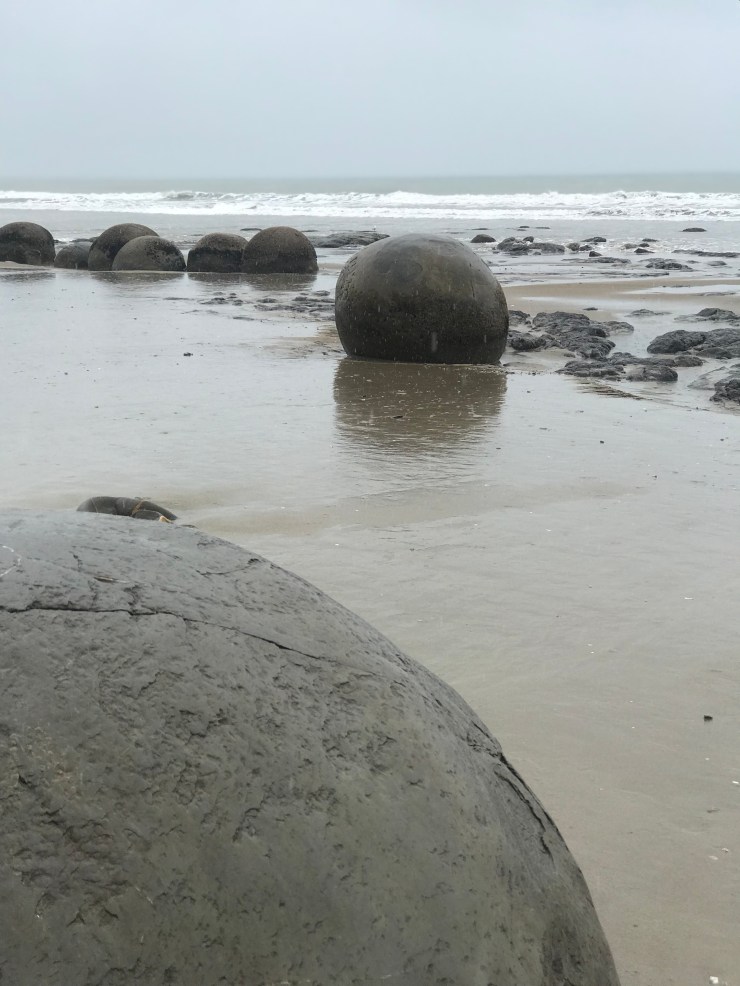
Activities/All About: The big draw for this area is the Moeraki Boulders. My Airbnb advertised a private beach that you could walk to and view the boulders; but the beach is several kilometers away so unless you want to spend a few hours going back and forth, it’s driving distance. And even then, only accessible during low tide (which, presently, is in the morning). But I still really enjoyed my Airbnb stay. Plus, the fact that wifi was out at the house gave me an excuse to head into Moeraki in the evening. It’s a quaint beach community with only a few options, but I had a nice glass of wine and used the free (and really fast) wifi at Moeraki Tavern.
I actually waited to visit the boulders until the following morning, so I could see them at low tide. It was a super gray and rainy day, but the boulders were still super impressive and definitely worth stopping to see!


Day 4: Dunedin, Kaka Point, & Nugget Point Lighthouse; Overnight in Owaka
Before leaving my farm stay, I woke up in the morning and drove down to the private beach at the farm; Kane (border collie) ran all the way to/from the beach in front of the car, and played at the beach with me while I was down there. I loved that so much!

Transit: My drive took me through the list of places noted above.
Accommodation: Couchsurfing #2. This time, at a farm just outside of Owaka. My host this time was Steve, a nice and quirky guy, with two cats (one of which is the biggest cat I’ve ever seen). I continued to be amazed at how trusting and generous people are here. I am a complete stranger and Steve had no problem providing me access to his house, even though he did not get home for over an hour after my arrival. (Travel continues to reinforce: people are inherently good, despite what the news would lead us to believe.) The views from his place were awesome. Because it didn’t get dark until after 10:30pm, and I find it hard to fall asleep when the sun is shining, Steve and I binged LOTR Two Towers and Return of the King. Hey, I was in NZ for the first time and I really do love these movies. Made for a great way to finish the day!


Activities/All About: The weather was absolute crap this day. So it didn’t make sense to take a lot of side trips for photography that I had planned (beaches south of Dunedin). Instead, I spent more time walking around Dunedin (full on college town, and thankfully, that meant lots of cafes open on a Sunday to pass some time).


The highlight was definitely the walk up Baldwin Street, the steepest residential street in the world. Holy $^!+ Batman! I have no idea how they constructed everything here, and even more clueless about how the residents manage to navigate this street during winter.


Despite gray skies, I didn’t want to skip all of my prior visits for the day, so I still headed through Kaka Point over to Nugget Point. Thankfully, the rain stopped by the time I made it to the lighthouse. Sadly, I didn’t see any penguins, but I did get some great views. This part of the drive is part of the Southern Scenic Route, and because my drive this day and the next were so awesome and photoworthy, they get their own post: South Coast Scenic Drive.
Day 5: Catlins Forest Park & the South Coast; Overnight in Te Anau
Today was one of my favorite road trip days, and a continuation of my drive along the Southern Scenic Route. Te Anau is beautiful and charming, and I managed to catch a photo of the famous Te Anau jetty just before sunrise (bonus: nobody else around!).

Accommodation: My accommodations for the night were at Barnyard Backpackers Te Anau, about 5 miles south of Te Anau. In addition to being super affordable, the location was beautiful (so long as you don’t mind not being walking distance from Te Anau), it had a huge, clean, modern kitchen, and the dorm rooms were cabins facing the mountains, with a stunning view. A great place to stay and I’d highly recommend it!
Days 6-7: Fiordland National Park, Queenstown, Arrowtown, & Central Otago Wineries; Overnights in Queenstown & Frankton.
Transit: The drive to Milford Sound is one of the most stunning in the South Island. Plus, there is so much to do in the Park on the way to the Sound, that this day trip has its own blog post: Fiordland National Park & Milford Sound. The drive from Te Anau to Milford Sound takes 2+ hours, and allow another 4-5 to get to Queenstown after.
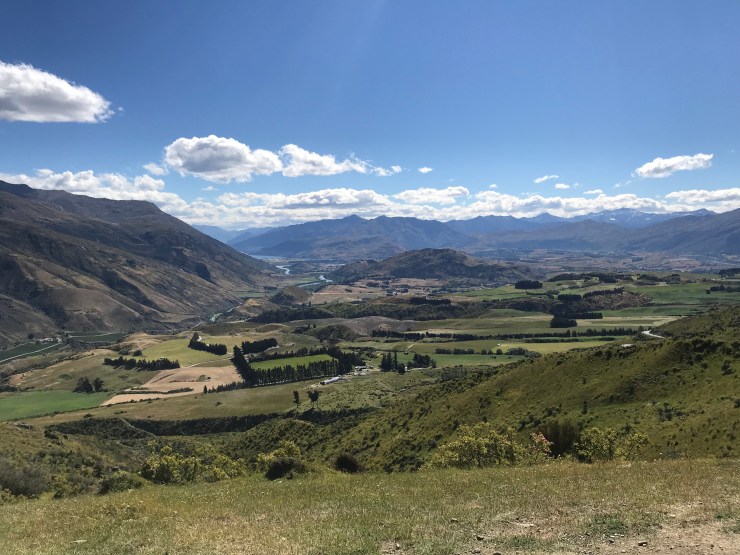
Photos of my first glimpse of Lake Wakatipu on the way to Queenstown. This drive offers loads of scenic lookout points, and it’s worth taking your time to stop! I think almost all of the photos below were taken around Kingston, just as the lake comes into view from the road.


Accommodation: I highly recommend the Wyndham Garden Queenstown, which is brand new (opened April 2018) and just a few minutes’ drive away from Queenstown City Center in Frankton. Though I had already booked and prepaid for two nights at a hostel in the city, that turned out to be a big mistake and the additional cost to get one great night of sleep (and facilities to cook and do my laundry, both in the room!) was SO worth it. If you’re on a budget and need something cheaper, my initial booking was at Absoloot Value Accommodation (74NZD for 2 nights) but I do not recommend staying here unless (1) you’re looking for a party hostel, and/or (2) you sleep like the dead. (Otherwise, the hostel was very clean, the staff friendly, and it boasts a waterfront location (right in the city center).
Activities/All About:
Queenstown
In addition to Milford Sound, I did spend some time exploring Queenstown, and the surrounding areas. Queenstown itself has a great energy and awesome waterfront parks that are full of families soaking up the sunshine when it’s nice. The city is surrounded by a mountain range (the Remarkables!) and has lovely gardens, especially the Queenstown Gardens. No shortage of beautiful locations to enjoy here.


It’s also the city to visit if you’re an adrenaline junkie- bungie jumping, sky diving, jet boating, you name it, you can do it in and around Queenstown. I had the most wonderful brunch at Vudu Café, right on the waterfront.


Central Otago Wineries
A short drive outside of Queenstown are loads of wineries. Because I was my own driver, I had to limit my visits. I made stops at two: Wet Jacket (because there’s a cheese shop in the same building!) and Chard Farm (because it’s also the best place to see another LOTR film location). Being so used to the fees for tastings in Napa, I was blown away by “prices” here. The tasting at Wet Jacket was only 5NZD, and it was free at Chard! They just noted that they were raising money for a local hospice, if anyone cared to make a donation (no pressure, but of course I did). The tastings at both were lovely, and it was cool seeing the blue river used to depict the River Anduin where the Fellowship canoe up to The Pillars of the Kings. You have to use your imagination when looking at my photos here.


Arrowtown
To finish the day, I stopped by Arrowtown. This place is much like many U.S. western cities- founded during the gold rush of the late 1800s, but as soon as that dried up, it became a ghost town. It has since been revived, mostly as a tourist town. Some cute shops and bars, but it reminded me of Branson, MO; not particularly authentic but trying to replicate “old timey” feel for tourists. The location made it convenient for a stop, but don’t go out of your way to get here.


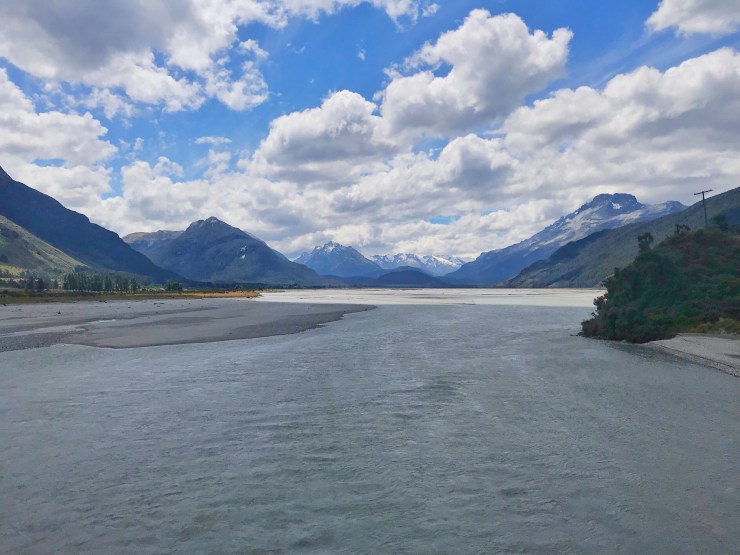
Day 8: Glenorchy and Paradise; Overnight in Wanaka
Transit: The drive between Queenstown and Glenorchy is another of the more remarkable road trips and worth it for the drive alone! The road to Glenorchy follows the coast of Lake Wakatipu right up to its northern point, and only takes around 45 minutes (though you will want to take advantage of scenic lookout points and make pit stops). The drive north along the paved road heading to Paradise takes only another 15 minutes, but if you decide to continue on Paradise Road itself, you’ll end up spending another hour or so (return) in the car. From Paradise Road, it took about 2 hours to get to Wanaka, my final stop for the day.
Accommodation: I stayed in a lovely Airbnb hosted by Dannielle and Rossco (yes, I would definitely recommend a stay here). Travel Tip- Airbnb Stays: for whatever reason, in the Queenstown/Wanaka area, almost all Airbnb homes restrict your access to bedroom/bathroom only; almost none permit you to use the kitchen or laundry facilities, both of which are the norm everywhere else I’ve ever stayed (including other parts of NZ). The exclusion of the kitchen is particularly surprising, considering one of the benefits of an Airbnb is the ability to cook for yourself if you want. But that’s just how it works here. Upside: most Airbnb hosts provide breakfast, which is not the norm for most Airbnb stays around the world.


Activities/All About: The drive between Queenstown and Glenorchy did not disappoint! It is positively stunning! And Glenorchy itself is super charming, and offers the most magnificent views of Lake Wakatipu.


After arriving in Glenorchy, I decided to go full-on nerd and take the drive down Paradise Road to visit Lorthlien (sp?) and Isengard. Both were filmed in Paradise. The drive there is beautiful, but do not attempt this in bad weather unless you have four-wheel drive. Thankfully, I had a lovely summer day, so my rental Corolla managed the unpaved road just fine.


But you can also save yourself an hour of driving by visiting a bridge that crosses the Drift River, and provides an almost equally great shot of “Isengard.” Quite frankly, I stopped worrying about trying to take photos at LOTR sites after this, because I realized: as much as I love the movies, I didn’t recognize any of the filming locations (apart from the Putangirua Pinnacles outside of Wellington) unless I was online and comparing to the scene from the movie- and even then, you often had to use a lot of immagination because so much digital was added in. So, although I was in the center of “Middle Earth” and drove through and past many other LOTR filming locations, this was the last one I worried about photographing.
The drive to Wanka is part of the Alpine Scenic Trail, and offers stunning views from the mountains.
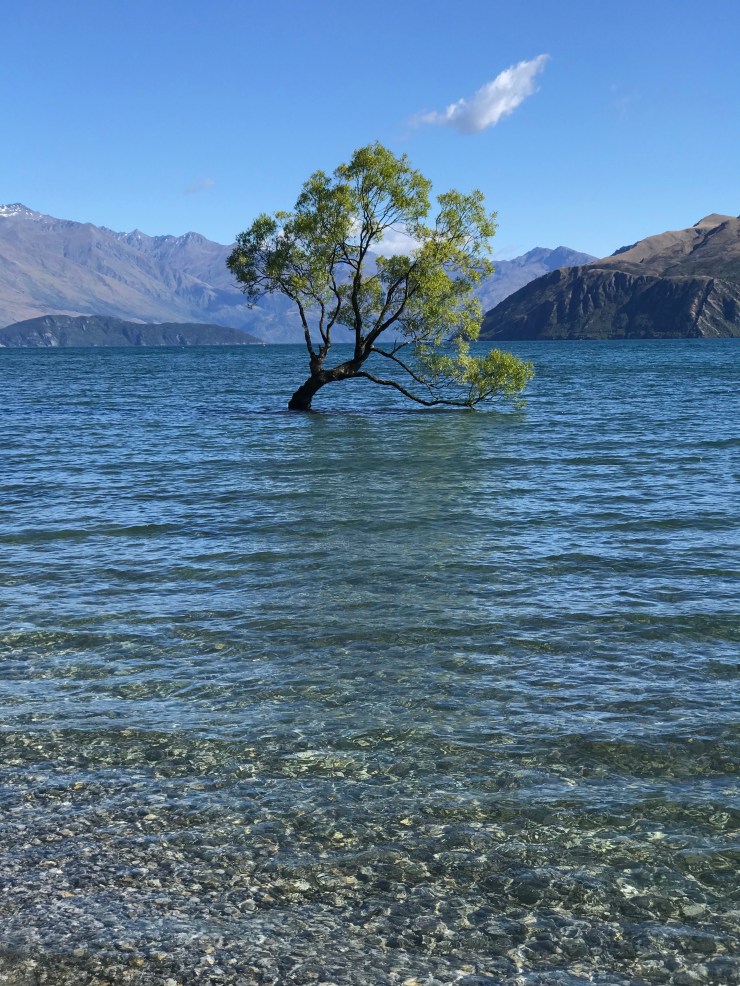
Wanaka is a really charming town, and I am so grateful to Jodi for telling me how much she loved it here, because without her advice I would have spent yet another night in Queenstown and missed it here!
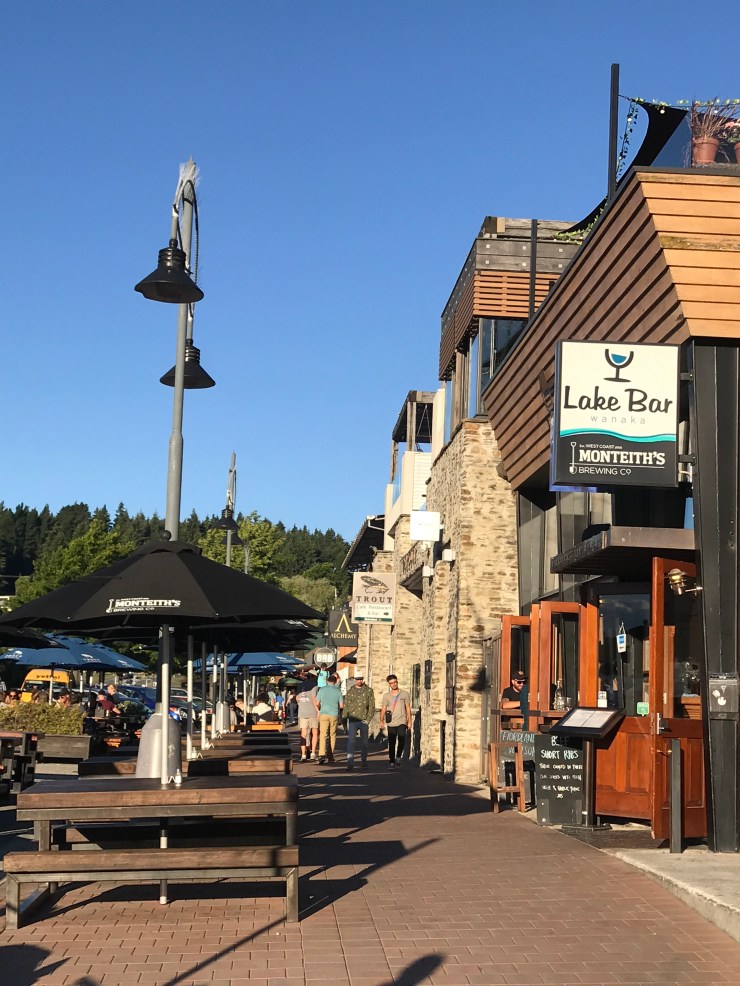
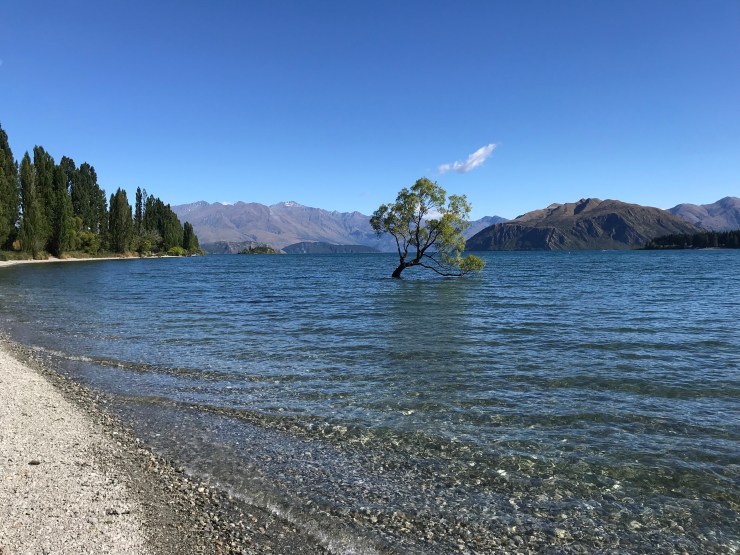
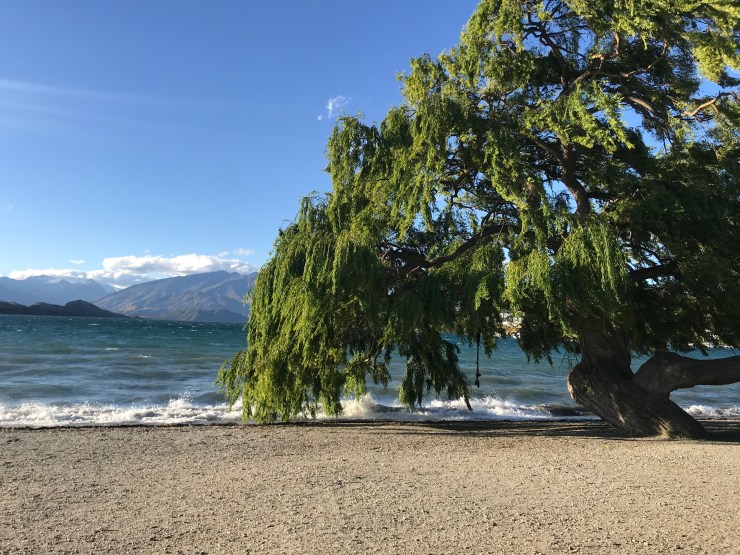
I spent the evening walking around the waterfront before popping into Cork Bar for the evening; it’s an absolutely fantastic wine bar (they have loads of draft/craft beer, cider, and spirits too). Highly recommend!


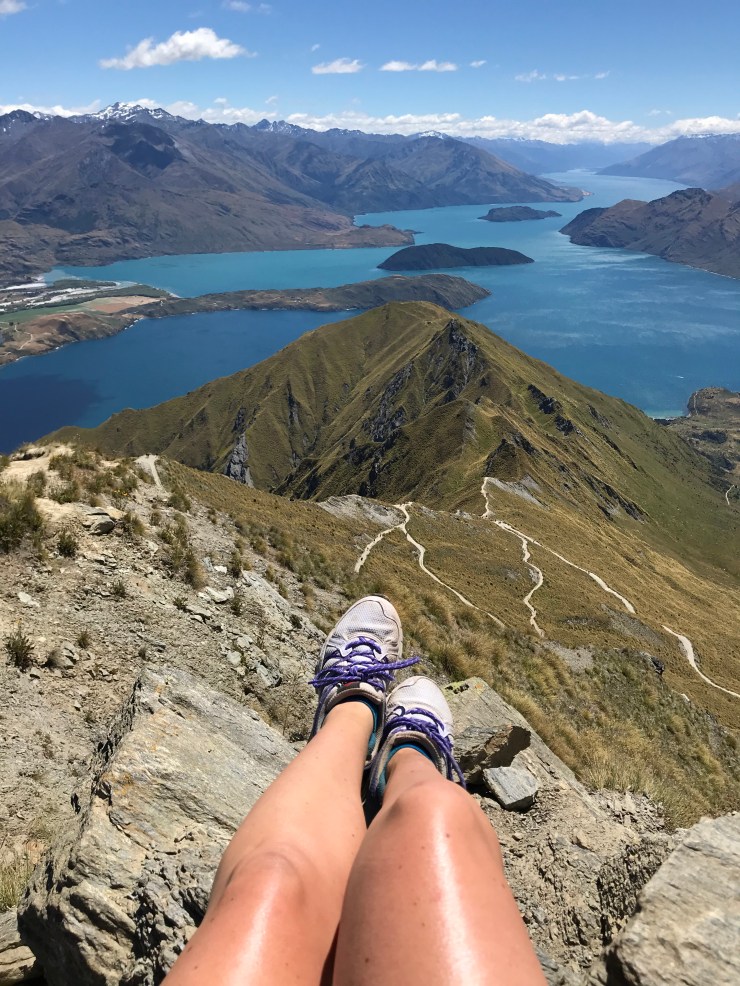
Day 9: Roy’s Peak (Wanaka) & Mt. Cook Village; Overnight in Mt. Cook.
Before driving to Mt. Cook, I decided to spend my last morning in Wanaka checking out one of the day hikes in the area. There are so many options, and although my Airbnb host recommended doing the Rob Roy Glacier trek, I opted to do the more well known Roy’s Peak. You can read about that in my post on Epic South Island Day Hikes.
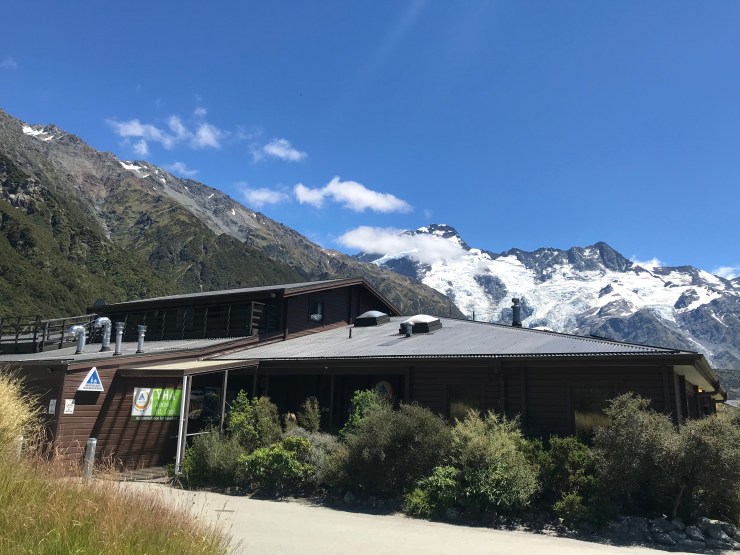
Accommodation: There are limited options if you want to stay in Mt. Hood village, and unless you can afford to stay at the upscale Hermitage (rates started around 400NZD/night when I was there), the YHA Aoraki Mt. Cook Hostel isn’t a bad place to go. There were loads of families staying in this hostel when I was there, and the location and view from the hostel is spectacular. Only real downside: the bunk beds have these flimsy, metal frames, so every time the guy on the bunk below me moved it shook the entire bed, making it hard to fall asleep. But everything else about the place was great. Travel Tip: if staying in Mt. Cook Village, be sure to do your grocery shopping before getting to this town, because there are no proper grocery stores (or gas stations) in the area!
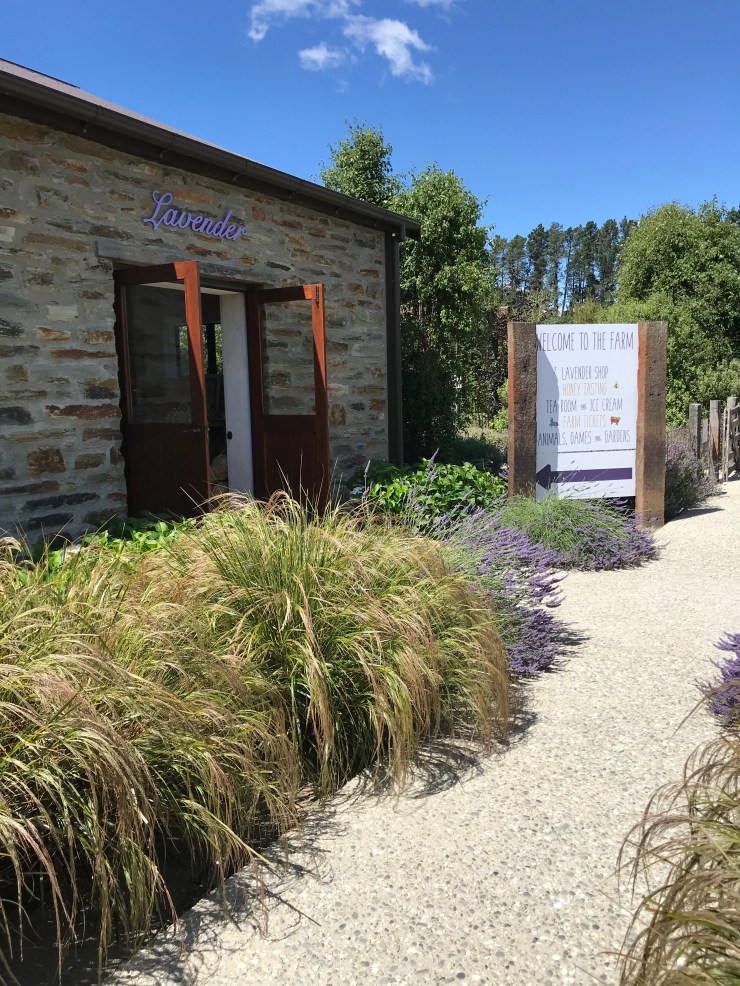
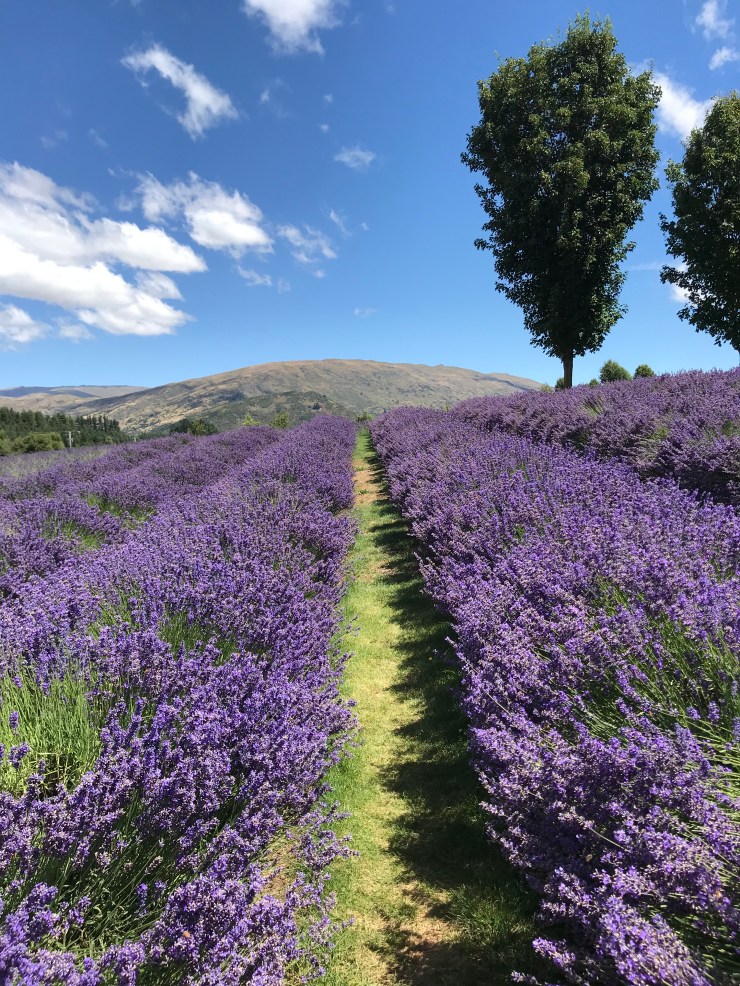
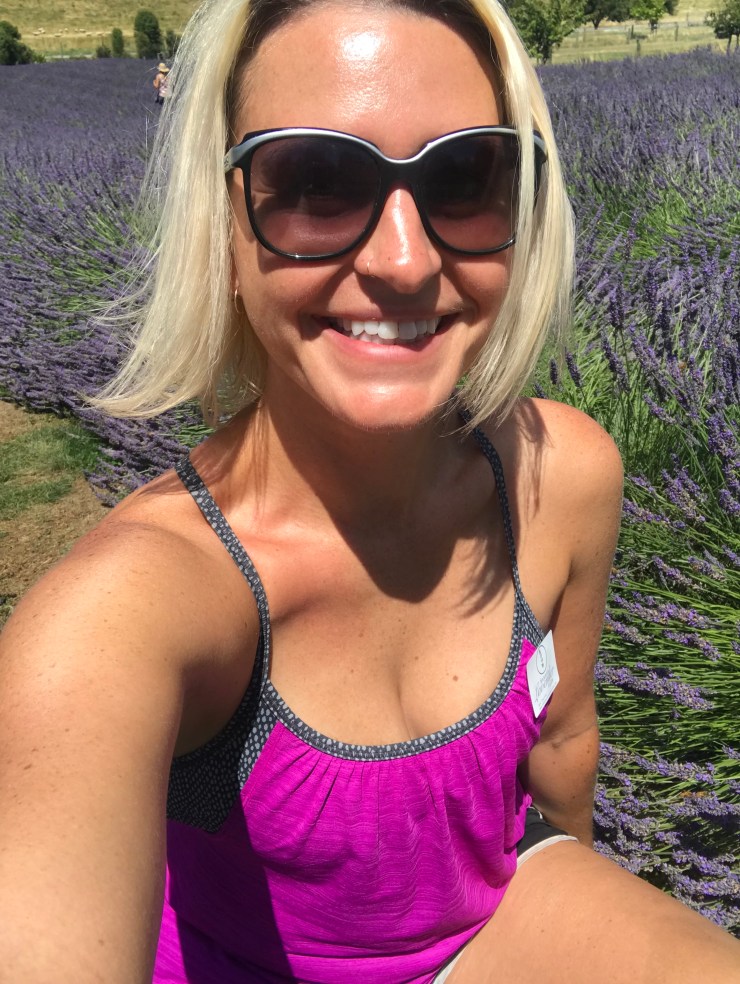
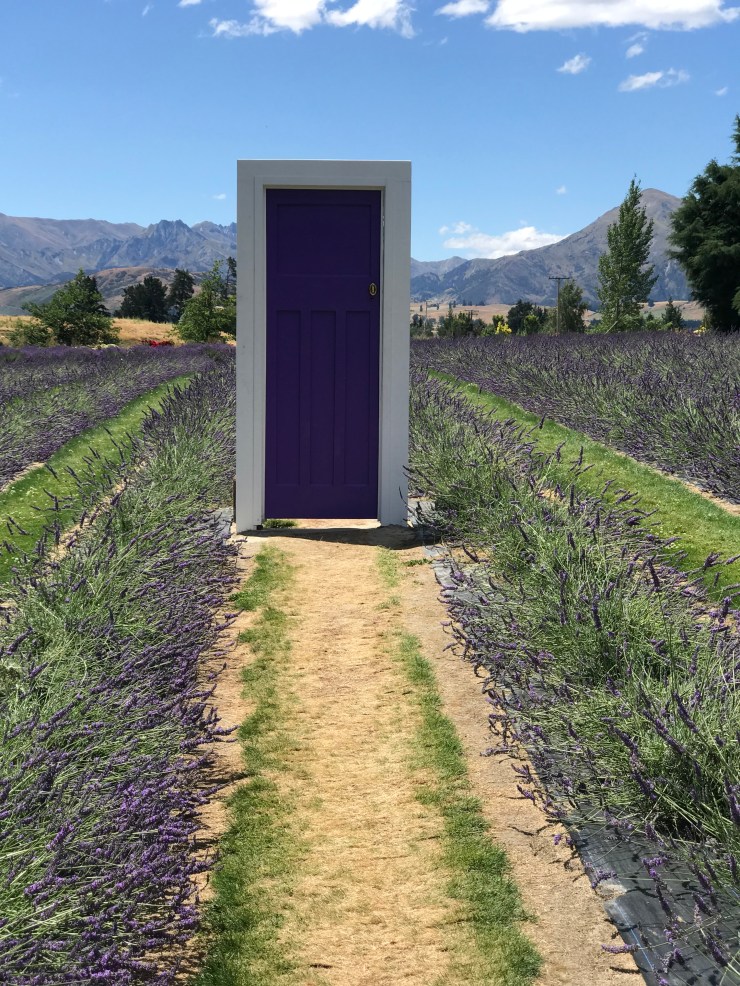
Activities/All About: After thoroughly kicking my own butt on Roy’s Peak, I decided to treat myself to a lovely stop at a gorgeous lavendar farm, Wanaka Lavendar Farm, that was just a few minutes down the road from Wanaka, on the road heading to Mt. Cook. There’s only one other lavendar farm you drive past on the road to Mt. Cook, and the one I stopped at, is much larger and more lovely. Cost is only 5NZD for entry, and they have massive gardens, including rose gardens, they make honey on site, and have a shop were you can buy plenty of souvenirs (as well as tea and ice cream).


Mt. Cook is NZ’s highest peak, and this area is the destination for climbers, but also offers loads of day hikes for those without mountaineering skills. You can read about the hike I did in my post on Epic Day Hikes.

Mt. Cook is also home to the Sir Edmund Hillary Center. A huge draw for me was learning that Mt. Hood (and my next destination, Tekapo) is located within a Dark Sky Reserve, which makes for some of the best night sky viewing in the southern hemisphere! The drive to Mt. Cook Village is another stunning one! I stopped numerous times along the way to take photos, because, how can you not?!
Day 10: Tekapo.
Transit: The drive was quick and easy, and affords lots of time to
Accommodation: I stayed in the Lakefront Lodge Backpackers Resort and highly recommend. This hostel is located right on the banks of the stunning Lake Tekapo, and is a short 1.5km (about 1 mile) walk into the town center. Though, downside was that it was the only hostel I stayed at in NZ without free wifi.
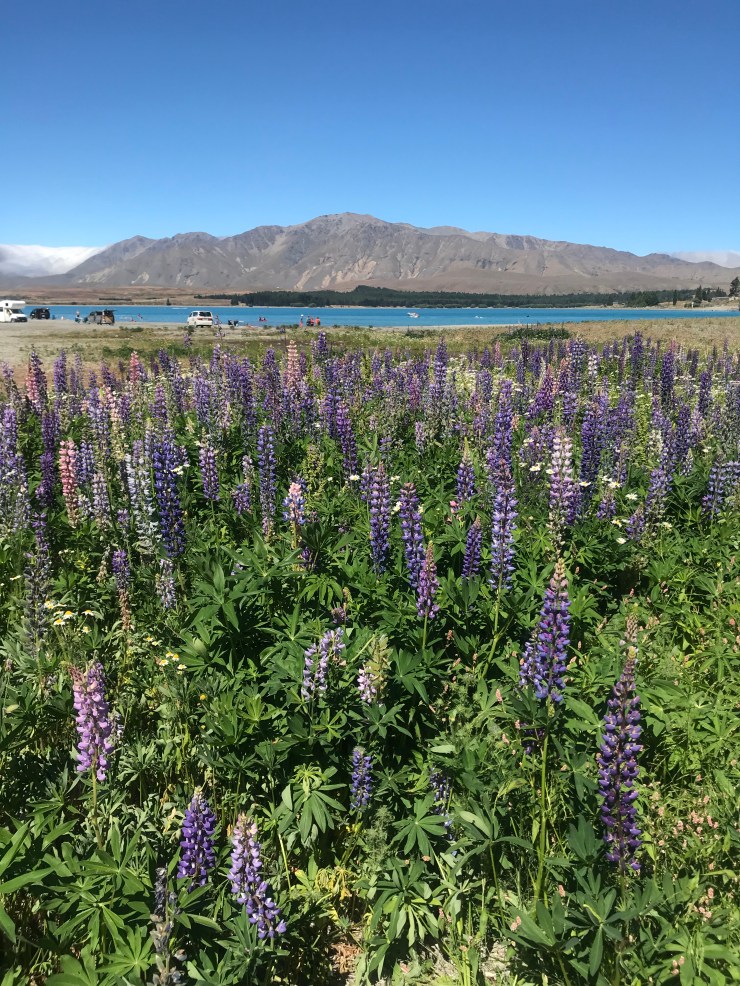
Activities/All About: Tekapo has a piece of my heart. Though it is a quiet town, there are plenty of activity options (hiking and water sports). Or, if you’re exhausted from numerous day hikes (like I was), it is the perfect place for some R&R. I spent a couple of hours having a pot of tea and taking advantage of the free wifi offered at Reflections Café & Restaurant. The local lupin flowers were in full bloom (yay for a late summer bloom this year!) all around the lake, which made it even more picturesque.

Tekapo’s Famous Church of the Good Shepard.


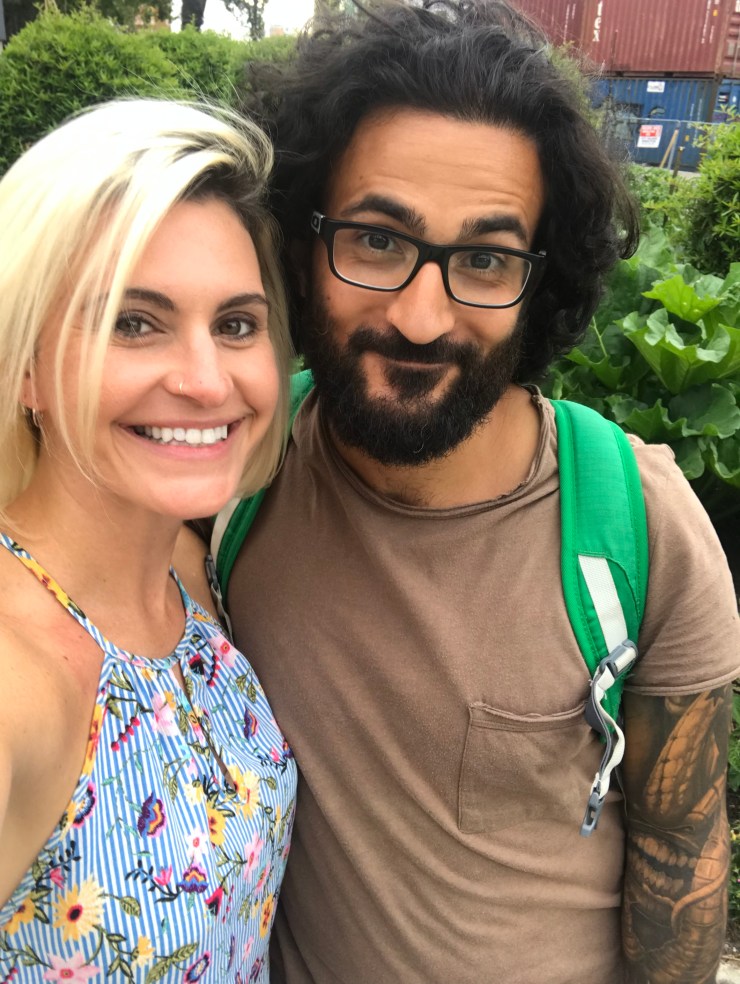
As always, the highlight of any of my travels are the people I meet, and Tekapo was no exception. Shortly after arriving to the hostel I met Valerio, an Italian living in Switzerland, who was doing his own road trip around NZ.
We decided to spend the rest of the day hanging out together and enjoyed a beautiful sunset by the lake, before driving out to a park (only 10 minutes from the hostel, but far enough from the lake to avoid lights) to take in a dark, stary night sky. It was breathtaking! Unfortunately, my iPhone is ill equipped to take photos of the night sky, but I did get a few lovely photos of sunset over Lake Tekapo.


That night was definitely one of the best of my entire trip in NZ- I have never seen a sky like that. Just… wow. Travel Tip/Star Gazing: (1) there’s no need to pay the $100+ for a tour to view the night sky. Just drive yourself slightly outside of the town center so that you are away from the (few) lights in that area, and bring warm clothes (or, if you need to be creative like me: wine and the comforter from your bed to warm you). (2) If you want to see the sky at the super popular Church of the Good Shepard, be prepared to hang out with a crowd (seriously, just about every other tourist visiting Tekapo will be there). (3) Be prepared for a late night. The sky becomes increasingly visible after midnight (keep in mind, there’s still light in the sky until around 10-10:30pm); Valerio and I spent a solid 3 hours taking in the starry sky, leaving only when (by 1:30am) it was just too cold for me to comfortably stay out any longer.
Days 11-12: Return to Christchurch; Depart NZ.
Transit: The drive from Tekapo back to Christchurch took about 2.5 hours. This segment returns you to the south island’s agricultural area, so nothing too noteworthy about that drive. My rental car company was open 24 hours/day, so returning the car at 4:30am the following morning (and catching a ride to the airport) wasn’t an issue at all.
Accommodation: I had such a good experience at Jailhouse Accommodations my first night in Christchurch that I stayed there for my final night in the country.
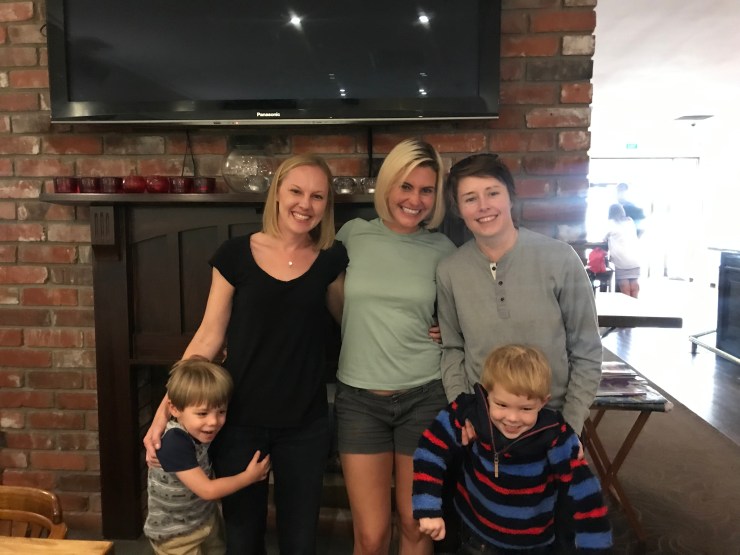
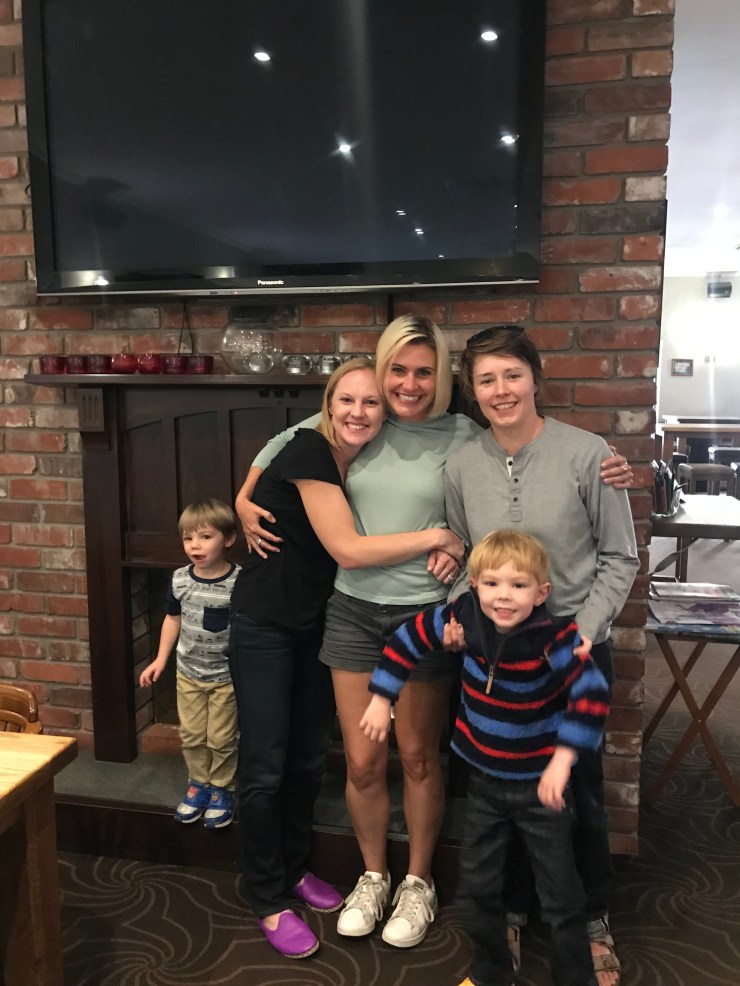
Activities/All About: The highlight of my final day in Christchurch was catching up with a friend from my first year of law school, and meeting her wonderful family! Social media can be so brilliant for connecting people, and thanks to another classmate of ours (thanks Katie!) I learned that Caroline had just (as in, one week ago) moved to Christchurch. We had an awesome dinner at The Brickworks (BBQ jackfruit vegan burger FTW!), which is super family/kid friendly, and it really was the perfect way to wrap up my amazing NZ trip.
I absolutely loved NZ, and will most definitely be back to explore more of this country. This definitely moves to the top of the list of favorite destinations visited so far!

3 thoughts on “The Ultimate NZ Road Trip: 12 Days in the South Island”